Tag Archives: Technology

Enabling and using Let’s Encrypt SSL Certificates on Kubernetes

Kubernetes is an awesome piece of kit, you can set applications to run within the cluster, make it visible to only apps within the cluster and/or expose it to applications outside of the cluster.

As part of my tinkering, I wanted to setup a Docker Registry to store my own images without having to make them public via docker hub.  Doing this proved a bit more complicated than expected since by default, it requires SSL which requires a certificate to be purchased and installed.

Enter Let’s Encrypt which allows you to get SSL certificates for free; and by using their API, you can set it to regularly renew. Kubernetes has the kube-lego project which allows this regular integration. So here, I’ll go through enabling an application (in this case, it’s a docker registry, but it can be anything).

First, lets ignore the lego project, and set up the application so that it is accessible normally. As mentioned above, this is the docker registry

I’m tying the registry storage to a pv claim, though you can modify this to tie to S3, instead etc.

---
kind: Deployment
apiVersion: extensions/v1beta1
metadata:
  name: registry
  namespace: default
  labels:
    name: registry
spec:
  replicas: 1
  selector:
    matchLabels:
      name: registry
  template:
    metadata:
      creationTimestamp: 
      labels:
        name: registry
    spec:
      volumes:
      - name: registry-data
        persistentVolumeClaim:
          claimName: registry-data
      containers:
      - name: registry
        image: registry:2
        resources: {}
        volumeMounts:
        - name: registry-data
          mountPath: "/var/lib/registry"
        terminationMessagePath: "/dev/termination-log"
        terminationMessagePolicy: File
        imagePullPolicy: Always
      restartPolicy: Always
      terminationGracePeriodSeconds: 30
      dnsPolicy: ClusterFirst
      securityContext: {}
      schedulerName: default-scheduler
  strategy:
    type: Recreate
---
kind: Service
apiVersion: v1
metadata:
  name: registry
  namespace: default
  labels:
    name: registry
spec:
  ports:
  - protocol: TCP
    port: 9000
    targetPort: 5000
  selector:
    name: registry
  type: LoadBalancer
  sessionAffinity: None
  externalTrafficPolicy: Cluster

Once you’ve applied this, verify your config is correct by ensuring you have an external endpoint for the service (use kubectl describe service registry | grep "LoadBalancer Ingress"). On AWS, this will be an ELB, on other clouds, you might get an IP. If you get an ELB, CNAME a friendly name to it. If you get an IP, create an A record for it. I’m going to use registry.blenderfox.com for this test.

Verify by doing this. Bear in mind it can take a while before DNS records updates so be patient.

host $(SERVICE_DNS)

So if I had set the service to be registry.blenderfox.com, I would do

host registry.blenderfox.com

If done correctly, this should resolve to the ELB then resolve to the ELB IP addresses.

Next, try to tag a docker image of the format registry-host:port/imagename, so, for example, registry.blenderfox.com:9000/my-image.

Next try to push it.

docker push registry.blenderfox.com:9000/my-image

It will fail because it can’t talk over https

docker push registry.blenderfox.com:9000/my-image
The push refers to repository [registry.blenderfox.com:9000/my-image]
Get https://registry.blenderfox.com:9000/v2/: http: server gave HTTP response to HTTPS client

So let’s now fix that.

Now let’s start setting up kube-lego

Checkout the code
git clone git@github.com:jetstack/kube-lego.git

cd into the relevant folder
cd kube-lego/examples/nginx

Start applying the code base

kubectl apply -f lego/00-namespace.yaml
kubectl apply -f nginx/00-namespace.yaml
kubectl apply -f nginx/default-deployment.yaml
kubectl apply -f nginx/default-service.yaml

Open up nginx/configmap.yaml and change the body-size: "64m" line to a bigger value. This is the maximum size you can upload through nginx. You’ll see why this is an important change later.

kubectl apply -f nginx/configmap.yaml
kubectl apply -f nginx/service.yaml
kubectl apply -f nginx/deployment.yaml

Now, look for the external endpoint for the nginx service
kubectl describe service nginx -n nginx-ingress | grep "LoadBalancer Ingress"

Look for the value next to LoadBalancer Ingress. On AWS, this will be the ELB address.

CNAME your domain for your service (e.g. registry.blenderfox.com in this example) to that ELB. If you’re not on AWS, this may be an IP, in which case, just create an A record instead.

Open up lego/configmap.yaml and change the email address in there to be the one you want to use to request the certs.

kubectl apply -f lego/configmap.yaml
kubectl apply -f lego/deployment.yaml

Wait for the DNS to update before proceeding to the next step.

host registry.blenderfox.com

When the DNS is updated, finally create and add an ingress rule for your service:

---
kind: Ingress
apiVersion: extensions/v1beta1
metadata:
  name: registry
  namespace: default
  annotations:
    kubernetes.io/ingress.class: nginx
    kubernetes.io/tls-acme: 'true'
spec:
  tls:
  - hosts:
    - registry.blenderfox.com
    secretName: docker-tls
  rules:
  - host: registry.blenderfox.com
    http:
      paths:
      - path: "/"
        backend:
          serviceName: registry
          servicePort: 9000
status:
  loadBalancer:
    ingress:
    - {}

Look add the logs in nginx-ingress/nginx and you’ll see the Let’s Encrypt server come in to validate:

100.124.0.0 - [100.124.0.0] - - [19/Jan/2018:09:50:19 +0000] "GET /.well-known/acme-challenge/[REDACTED] HTTP/1.1" 200 87 "-" "Mozilla/5.0 (compatible; Let's Encrypt validation server; +https://www.letsencrypt.org)" 277 0.044 100.96.0.3:8080 87 0.044 200

And look in the logs on the kube-lego/kube-lego pod and you’ll see the success and saving of the secret

time="2018-01-19T09:49:45Z" level=info msg="requesting certificate for registry.blenderfox.com" context="ingress_tls" name=registry namespace=default 
time="2018-01-19T09:50:21Z" level=info msg="authorization successful" context=acme domain=registry.blenderfox.com 
time="2018-01-19T09:50:47Z" level=info msg="successfully got certificate: domains=[registry.blenderfox.com] url=https://acme-v01.api.letsencrypt.org/acme/cert/[REDACTED]" context=acme 
time="2018-01-19T09:50:47Z" level=info msg="Attempting to create new secret" context=secret name=registry-tls namespace=default 
time="2018-01-19T09:50:47Z" level=info msg="Secret successfully stored" context=secret name=registry-tls namespace=default 

Now let’s do a quick verify:

curl -ILv https://registry.blenderfox.com
...
* Server certificate:
*  subject: CN=registry.blenderfox.com
*  start date: Jan 19 08:50:46 2018 GMT
*  expire date: Apr 19 08:50:46 2018 GMT
*  subjectAltName: host "registry.blenderfox.com" matched cert's "registry.blenderfox.com"
*  issuer: C=US; O=Let's Encrypt; CN=Let's Encrypt Authority X3
*  SSL certificate verify ok.
...

That looks good.

Now let’s re-tag and try to push our image

docker tag registry.blenderfox.com:9000/my-image registry.blenderfox.com/my-image
docker push registry.blenderfox.com/my-image

Note we are not using a port this time as there is now support for SSL.

BOOM! Success.

The tls section indicates the host to request the cert on, and the backend section indicates which backend to pass the request onto. The body-size config is at the nginx level so if you don’t change it, you can only upload a maximum of 64m even if the backend service (docker registry in this case) can support it. I have it set here at “1g” so I can upload 1gb (some docker images can be pretty large)

Kubernetes V1.9 released

From the Kubernetes blog, the next version of Kubernetes has been released. And one feature has definitely caught my eye:

Windows Support (beta)

Kubernetes was originally developed for Linux systems, but as our users are realizing the benefits of container orchestration at scale, we are seeing demand for Kubernetes to run Windows workloads. Work to support Windows Server in Kubernetes began in earnest about 12 months ago. SIG-Windows has now promoted this feature to beta status, which means that we can evaluate it for usage.

So users of Windows can now hook up Windows boxes into their cluster. Which leads to an interesting case of mixed-OS clusters. Strictly speaking, that’s already possible now with a mix of Linux distributions able to run Kubernetes.

http://blog.kubernetes.io/2017/12/kubernetes-19-workloads-expanded-ecosystem.html

Guide to creating a Kubernetes Cluster in existing subnets & VPC on AWS with kops

This article is a guide on how to setup a Kubernetes cluster in AWS using kops and plugging it into your own subnets and VPC. We attempt to minimise the external IPs used in this method.

Export your AWS API keys into environment variables

export AWS_ACCESS_KEY_ID='YOUR_KEY'
export AWS_SECRET_ACCESS_KEY='YOUR_ACCESS_KEY'
export CLUSTER_NAME="my-cluster-name"
export VPC="vpc-xxxxxx"
export K8SSTATE="s3-k8sstate"</pre>

Create the cluster (you can change some of these switches to match your requirements. I would suggest only using one worker node and one master node to begin with and then increase them once you have confirmed the config is good. The more workers and master nodes you have, the longer it will take to run a rolling-update.

kops create cluster --cloud aws --name $CLUSTER_NAME --state s3://$K8SSTATE --node-count 1 --zones eu-west-1a,eu-west-1b,eu-west-1c --node-size t2.micro --master-size t2.micro --master-zoneseu-west-1a,eu-west-1b,eu-west-1c --ssh-public-key ~/.ssh/id_rsa.pub --topology=private --networking=weave --associate-public-ip=false --vpc $VPC

Important note: There must be an ODD number of master zones. If you tell kops to use an even number zones for master, it will complain.

If you want to use additional security groups, don’t add them yet — add them after you have confirmed the cluster is working.

Internal IPs: You must have a VPN connection into your VPC or you will not be able to ssh into the instances. The alternative is to use the bastion functionality using the --bastion flag with the create command. Then doing this:

ssh -i ~/.ssh/id_rsa -o ProxyCommand='ssh -W %h:%p admin@bastion.$CLUSTER_NAME' admin@INTERNAL_MASTER_IP

However, if you do this method, you MUST then use public IP addressing on the api load balancer, as you will not be able to do kops validate otherwise.

Edit the cluster

kops edit cluster $CLUSTER_NAME --state=s3://$K8SSTATE

Make the following changes:

If you have a VPN connection into the VPC, change spec.api.loadBalancer.type to “Internal“, otherwise, leave it as “Public
Change spec.subnets to match your private subnets. To use existing private subnets, they should also include the id of the subnet and match the CIDR range, e.g.:

subnets:
- cidr: 10.10.10.0/23
  id: subnet-xxxxxxx
  name: eu-west-1a
  type: Private
  zone: eu-west-1a</pre>

The utility subnet is where the Bastion hosts will be placed, and these should be in a public subnet, since they will be the inbound route into the cluster from the internet.

If you need to change or add specific IAM permissions, add them under spec.additionalPolicies like this to add additional policies to the node IAM policy (apologies about the formatting. WordPress is doing something weird to it.)

additionalPolicies:
  node: | 
    [ 
      {  
        "Effect": "Allow", 
        "Action": ["dynamodb:*"],
        "Resource": ["*"] 
      },  
      {  
        "Effect": "Allow",  
        "Action": ["es:*"],     
        "Resource": ["*"]     
      }    
    ]

Edit the bastion, nodes, and master configs (MASTER_REGION is the zone where you placed the master. If you are running a multi-region master config, you’ll have to do this for each region)

kops edit ig master-{MASTER_REGION} --name=$CLUSTER_NAME --state s3://$K8SSTATE

kops edit ig nodes --name=$CLUSTER_NAME --state s3://$K8SSTATE
kops edit ig bastions --name=$CLUSTER_NAME --state s3://$K8SSTATE

Check and make any updates.

If you want a mixture of instance types (e.g. t2.mediums and r3.larges), you’ll need to separate these using new instance groups ($SUBNETS is the subnets where you want the nodes to appear — for example, you can provide a list “eu-west-2a,eu-west-2b)

kops create ig anothernodegroup --state s3://$K8SSTATE --subnets $SUBNETS

You can later delete this with

kops delete ig anothernodegroup --state s3://$K8SSTATE

If you want to use spot prices, add this under the spec section (x.xx is the price you want to bid):

maxPrice: "x.xx"

Check the instance size and count if you want to change them (I would recommend not changing the node count just yet)

If you want to add tags to the instances (for example for billing), add something like this to the spec section:

cloudLabels:
  Billing: product-team</pre>

If you want to run some script(s) at node startup (cloud-init), add them to spec.additionalUserData:

spec:
  additionalUserData:
  - name: myscript.sh
    type: text/x-shellscript
    content: |
      #!/bin/sh
      echo "Hello World.  The time is now $(date -R)!" | tee /root/output.txt

Apply the update:

kops update cluster $CLUSTER_NAME --state s3://$K8SSTATE --yes

Wait for DNS to propagate and then validate

kops validate cluster --state s3://$K8SSTATE

Once the cluster returns ready, apply the Kubernetes dashboard

kubectl apply -f https://raw.githubusercontent.com/kubernetes/dashboard/master/src/deploy/alternative/kubernetes-dashboard.yaml

Access the dashboard via

https://api.$CLUSTER_NAME/api/v1/namespaces/kube-system/services/kubernetes-dashboard/proxy/

also try:

https://api.$CLUSTER_NAME/api/v1/namespaces/kube-system/services/https:kubernetes-dashboard:/proxy/

If the first doesn’t work

(ignore the cert error)

Username is “admin” and the password is found from your local ~/.kube/config

Add the External DNS update to allow you to give friendly names to your externally-exposed services rather than the horrible elb names.

See here: https://github.com/kubernetes-incubator/external-dns/blob/master/docs/tutorials/aws.md

(You can apply the yaml directly onto the cluster via the dashboard. Make sure you change the filter to match your domain or subdomain. )

Note that if you use this, you’ll need to change the node IAM policy on the cluster config as the default IAM policy won’t allow the External DNS container to modify Route 53 entries, and also annotate (use kubectl annotate $service_name key:value) your service with text such as:

external-dns.alpha.kubernetes.io/hostname: $SERVICE_NAME.$CLUSTERNAME

And also you might need this annotation, to make the ELB internal rather than public – otherwise Kubernetes will complain “Error creating load balancer (will retry): Failed to ensure load balancer for service namespace/service: could not find any suitable subnets for creating the ELB”

service.beta.kubernetes.io/aws-load-balancer-internal: 0.0.0.0/0

(Optional) Add the Cockpit pod to your cluster as described here

http://cockpit-project.org/guide/133/feature-kubernetes.html

It will allow you to visually see a topology of your cluster at a cluster and also provides some management features too. For example, here’s my cluster. It contains 5 nodes (1 master, 4 workers and is running 4 services (Kubernetes, external-dns, cockpit, and dashboard). Cockpit creates a replication controller so it knows about the changes.

chrome_2018-01-14_15-44-00

Add any additional security groups by adding this under the spec section of the node/master/bastions config, then do a rolling-update (you might need to use the --force switch), do this as soon as you can after creating and verifying the cluster updates work.

additionalSecurityGroups:
- sg-xxxxxxxx
- sg-xxxxxxxx

If the cluster breaks after this (i.e. the nodes haven’t shown up on the master), reboot the server (don’t terminate, use the reboot option from the AWS console), and see if that helps. If it still doesn’t show up, there’s something wrong with the security groups attached — i.e. they’re conflicting somehow with the Kubernetes access. Remove those groups and then do another rolling-update but use both the --force and --cloudonly switches to force a “dirty” respin.

If the cluster comes up good, then you can change the node counts on the configs and apply the update.

Note that if you change the node count and then apply the update, the cluster attempts to make the update without rolling-update. For example, if you change the node count from 1 to 3, the cluster attempts to bring up the 2 additional nodes.

Other things you can look at:

Kompose – which converts a docker-compose configuration into Kubernetes resources

Finally, have fun!

Massive Intel Chip Security Flaw Threatens Computers

An Intel flaw that has been sitting hidden for a decade has finally surfaced.

Being on the chip rather than the OS, it doesn’t affect a single OS — with Linux, Windows and MacOS being mentioned in this article.

https://www.linuxinsider.com/story/85039.html

Tinkering with Kubernetes and AWS


This article just goes through my tinkering with Kubernetes on AWS.

Create a new S3 bucket to store the state of your Kubernetes clusters

aws s3 mb s3://k8sstate --region eu-west-2

Verify

aws s3 ls

Create a Route 53 hosted zone. I’m creating k8stest.blenderfox.uk

aws route53 create-hosted-zone --name k8stest.blenderfox.uk \
--caller-reference $(uuidgen)

dig the nameservers for the hosted zone you created

dig NS k8stest.blenderfox.uk

If your internet connection already has DNS setup to the hosted zone, you’ll see the nameservers in the output:

;; QUESTION SECTION:
;k8stest.blenderfox.uk.     IN  NS

;; ANSWER SECTION:
k8stest.blenderfox.uk. 172800 IN NS ns-1353.awsdns-41.org.
k8stest.blenderfox.uk. 172800 IN NS ns-1816.awsdns-35.co.uk.
k8stest.blenderfox.uk. 172800 IN NS ns-404.awsdns-50.com.
k8stest.blenderfox.uk. 172800 IN NS ns-644.awsdns-16.net.


Export your AWS credentials as environment variables (I’ve found Kubernetes doesn’t reliably pick up the credentials from the aws cli especially if you have multiple profiles

export AWS_ACCESS_KEY_ID='your key here'
export AWS_SECRET_ACCESS_KEY='your secret access key here'

You can also add it to a bash script and source it.

Create the cluster using kops. Note that the master zones must have an odd count (1, 3, etc.) since eu-west-2 only has two zones (a and b), I have to have only one zone here

kops create cluster --cloud aws --name cluster.k8stest.blenderfox.uk \
--state s3://k8sstate --node-count 3 --zones eu-west-2a,eu-west-2b \
--node-size m4.large --master-size m4.large \
--master-zones eu-west-2a \
--ssh-public-key ~/.ssh/id_rsa.pub \
--master-volume-size 50 \
--node-volume-size 50 \
--topology private

You can also add the --kubernetes-version switch to specifically pick a Kubernetes version to include in the cluster. Recognised versions are shown at

https://github.com/kubernetes/kops/blob/master/channels/stable

TL;DL: Bands are:

  • >=1.4.0 and <1.5.0
  • >=1.5.0 and <1.6.0
  • >=1.6.0 and <1.7.0
  • >=1.7.0

Each with their own Debian image.


Assuming the create completed successfully, update the cluster so it pushes the update out to your cloud

kops update cluster cluster.k8stest.blenderfox.uk --yes \
--state s3://k8sstate

While the cluster starts up, all the new records will be set up with placeholder IPs.

Selection_004

NOTE: Kubernetes needs an externally resolvable DNS name. Basically, you need to be able to create a hosted zone on a domain you control. You can’t use Kops on a domain you can’t control, even if you hack the resolver config.

The cluster can take a while to come up. Use

kops validate cluster --state s3://k8sstate

To check the cluster state.

When ready, you’ll see something like this:

Using cluster from kubectl context: cluster.k8stest.blenderfox.co.uk

Validating cluster cluster.k8stest.blenderfox.co.uk

INSTANCE GROUPS
NAME                    ROLE    MACHINETYPE     MIN     MAX     SUBNETS
master-eu-west-2a       Master  m4.large        1       1       eu-west-2a
nodes                   Node    m4.large        3       3       eu-west-2a,eu-west-2b

NODE STATUS
NAME                                            ROLE    READY
ip-172-20-35-51.eu-west-2.compute.internal      master  True
ip-172-20-49-10.eu-west-2.compute.internal  node    True
ip-172-20-72-100.eu-west-2.compute.internal     node    True
ip-172-20-91-236.eu-west-2.compute.internal     node    True

Your cluster cluster.k8stest.blenderfox.co.uk is ready

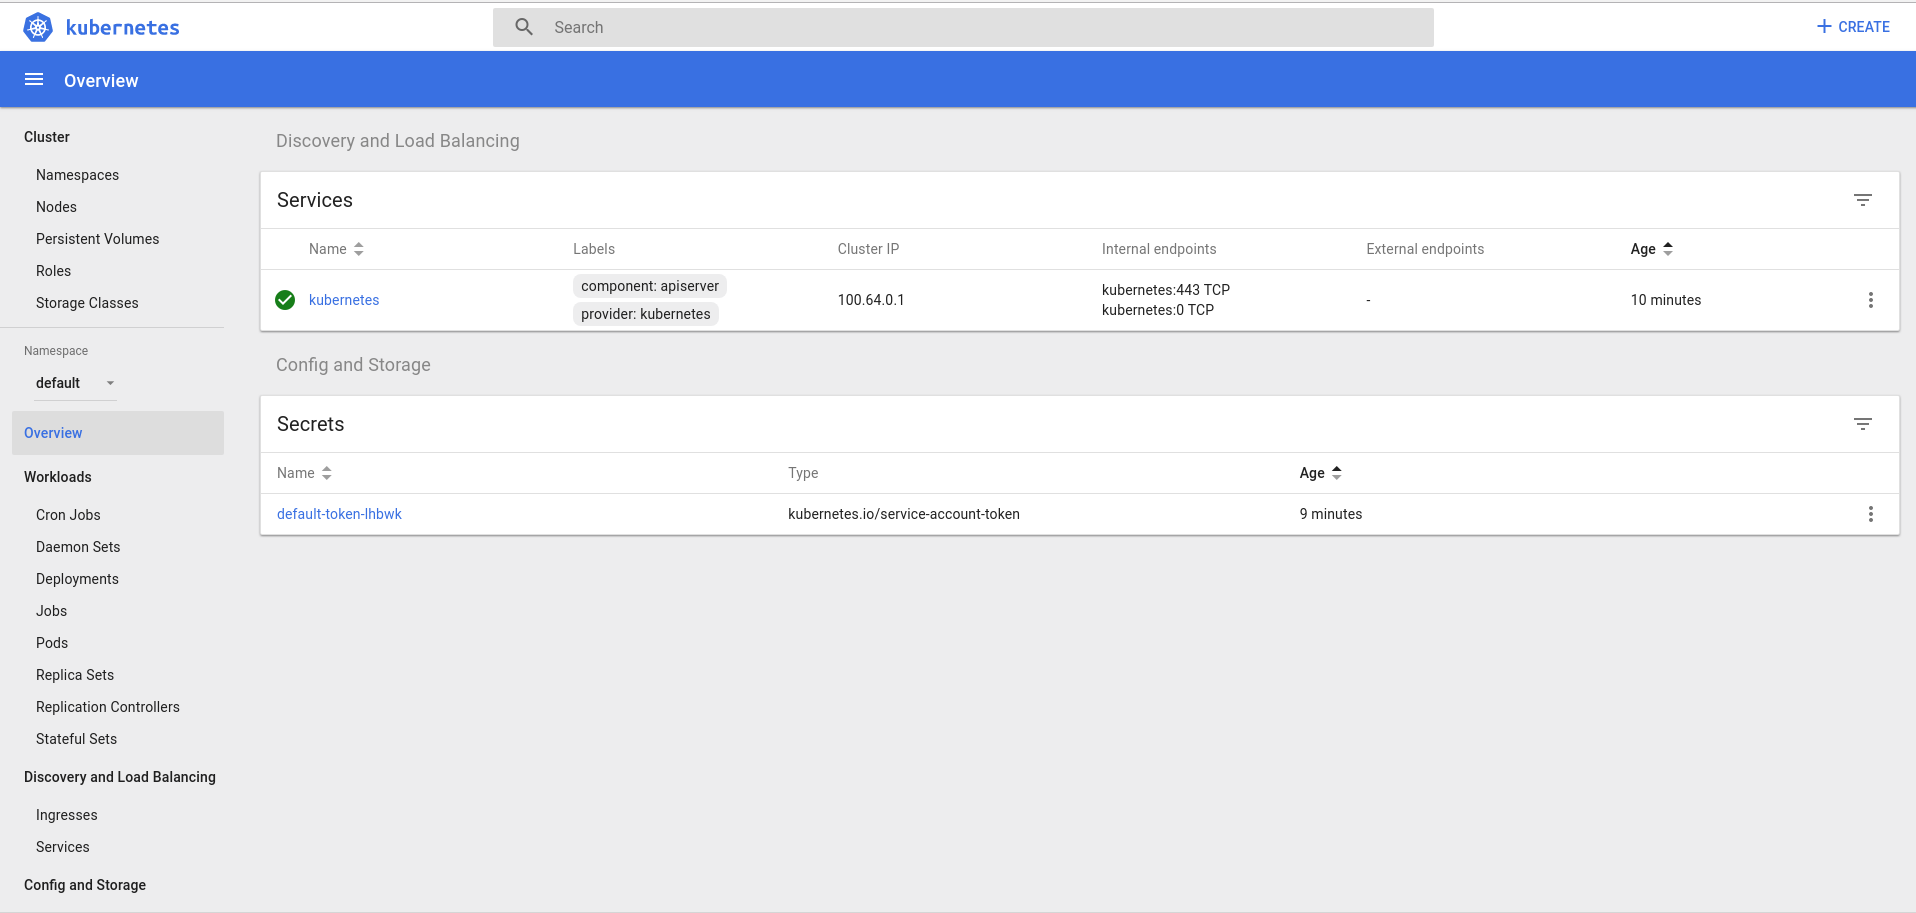
Now you can start interacting with the cluster. First thing is to deploy the Kubernetes dashboard

$ kubectl apply -f https://raw.githubusercontent.com/kubernetes/dashboard/master/src/deploy/alternative/kubernetes-dashboard.yaml
 serviceaccount "kubernetes-dashboard" created
 role "kubernetes-dashboard-minimal" created
 rolebinding "kubernetes-dashboard-minimal" created
 deployment "kubernetes-dashboard" created
 service "kubernetes-dashboard" created

Now setup a proxy to the api

$ kubectl proxy
Starting to serve on 127.0.0.1:8001

Next, access

http://localhost:8001/ui

To get the dashboard

Now let’s create a job to deploy on to the cluster.

Goodbye Apple, goodbye Microsoft… hello Linux

Not often I quote from a publication from Ireland, but this was quite an intriguing read. Someone who went from Windows to Mac to Linux (Mint)

Linux is everywhere – and will free your computer from corporate clutches

It was 2002, I was up against a deadline and a bullying software bubble popped up in Windows every few minutes. Unless I paid to upgrade my virus scanner – now! – terrible things would happen.

We’ve all had that right?

In a moment of clarity I realised that the virus scanner – and its developer’s aggressive business model – was more of a pest than any virus I’d encountered. Microsoft’s operating system was full of this kind of nonsense, so, ignoring snorts of derision from tech friends, I switched to the Apple universe.

It was a great choice: a system that just worked, designed by a team that clearly put a lot of thought into stability and usability. Eventually the iPhone came along, and I was sucked in farther, marvelling at the simple elegance of life on Planet Apple and giving little thought to the consequences.

Then the dream developed cracks. My MacBook is 10 years old and technically fine, particularly since I replaced my knackered old hard drive with a fast new solid-state drive. So why the hourly demands to update my Apple operating system, an insistence that reminded of the Windows virus scanner of old?

Apple is no different to Microsoft it seems.

I don’t want to upgrade. My machine isn’t up to it, and I’m just fine as I am. But, like Microsoft, Apple has ways of making you upgrade. Why? Because, as a listed company, it has quarterly sales targets to meet. And users of older MacBooks like me are fair game.

I looked at the price of a replacement MacBook but laughed at the idea of a midrange laptop giving me small change from €1,200. Two years after I de-Googled my life(iti.ms/2ASlrdY) I began my Apple prison break.

He eventually went for Linux Mint, which for a casual user is fine. I use Fedora and Ubuntu (and a really old version of Ubuntu since my workplace VPN doesn’t seem to work properly with anything above Ubuntu 14 – their way of forcing me onto either a Windows or Mac machine)

Source: https://www.irishtimes.com/business/technology/goodbye-apple-goodbye-microsoft-hello-linux-1.3295781

Apple can’t count….

My opinion of Apple and its practices has never been high. But this is just stupid.

Type in “1+2+3=” in an iOS 11 device’s calculator app, and you get 6 (correctly), but type it in quickly (as demonstrated in this video) and you get 24.

Sure, it’ll no doubt get patched soon and Apple will twist the incident to prove how fast they can push out updates compared to Android. But the point remains – how did such a bug make it past testing? And what OTHER, similarly stupid bugs that have yet to be detected, also make it past testing. And what if one of those bugs was in something fundamental? Something that breaks the functionality of the device? Something like the 1/1/1970 bug that would brick the device, or even the infamous “effective power” bug that would annoying reboot someone’s phone. Or even the famous crashsafari site that was only meant to crash safari but managed to crash the device too (originally, anyway).

OR, was there even ANY testing?

How to Install Multiple Linux Distributions on One USB

As someone who has tinkered with multiple distributions, this will be a great way to try out multiples

This tutorial shows you how to install multiple Linux distributions on one USB. This way, you can enjoy more than one live Linux distros on a single USB key.

Source: How to Install Multiple Linux Distributions on One USB

App That Paid Users to Exercise Owes Nearly $1 Million for Not Paying Users to Exercise

In the capitalistic nightmare we live in, everything has to be a transaction. So, when Pact launched its fitness app that let you make money for working out—or else pay a fee for failing to do so—it seemed to be the perfect motivational tool. There was just one problem: The company apparently wasn’t that great at paying up, and was it too good at collecting fees.

Hah, I remember this app. I actually did try it for a while but failed to see its appeal, or how it could make me continue to exercise. People would only be interested in this if they were really seriously wanting to meet a goal. People demotivated enough, would just cancel the pact/goal and continue on.

Source: App That Paid Users to Exercise Owes Nearly $1 Million for Not Paying Users to Exercise